WordPress№╝ѕсЃ»сЃ╝сЃЅсЃЌсЃгсѓ╣№╝ЅсЂДсђЂсЃќсЃГсѓ░УеўС║ІсЂФсђїжќбжђБУеўС║ІсђЇсѓњСИдсЂ╣сЂдсЂЈсѓїсѓІсЃЌсЃЕсѓ░сѓцсЃ│сђїWordpress Related PostsсђЇсѓњPCУАеуц║сЂД4тѕЌ№йў2УАїсђЂсѓ╣сЃъсЃЏУАеуц║сЂДсЂД2тѕЌ№йў4УАїсЂФсЂЌсЂдсђїУЅ»сЂёТёЪсЂўсђЇсЂФсЂЎсѓІТќ╣Т│Ћсђѓ
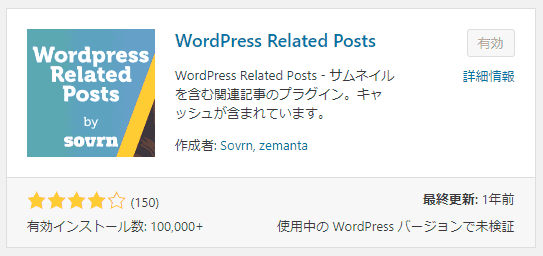
жќбжђБУеўС║ІсЃЌсЃЕсѓ░сѓцсЃ│сђїWordpress Related PostsсђЇ
жќбжђБУеўС║ІсѓњУАеуц║сЂЎсѓІсЃЌсЃЕсѓ░сѓцсЃ│сЂФсЂ«СИГсЂДсђЂСИђуЋфсЂЌсЂБсЂЈсѓіТЮЦсЂЪсђїWordpress Related PostsсђЇсђѓ
С╗ќсЂ«сЃЌсЃЕсѓ░сѓцсЃ│сЂДсѓѓУЕдсЂ┐сЂЪсЂ«сЂДсЂЎсЂїсђЂуљєТЃ│жђџсѓісЂФсЂфсЂБсЂЪсЂ«сЂїсЂЊсЂ«сЃЌсЃЕсѓ░сѓцсЃ│сЂ«сЂ┐сђѓ
жђџтИИсЂ«УеГт«џсЂасЂесЃљсЃЕсЃ│сѓ╣сЂїТѓфсЂё
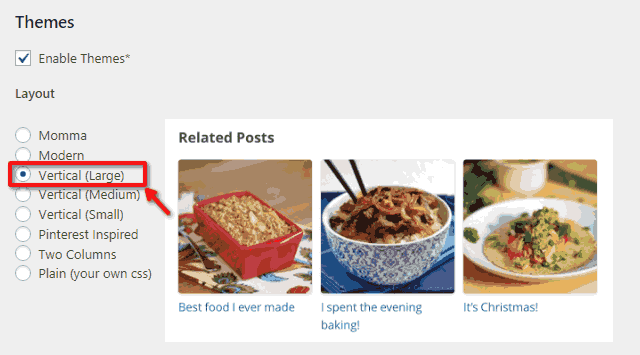
WordPress Related PostsсЂ«УеГт«џсЂДсђЂсЃгсѓцсѓбсѓдсЃѕсѓњсђїVertical (Large)сђЇсЂФтцЅТЏ┤сЂЎсѓІсЂЊсЂесЂД4№йў2сђЂ2№йў4сЂ«тйбсЂФсЂ»сЂфсѓісЂЙсЂЎсђѓ
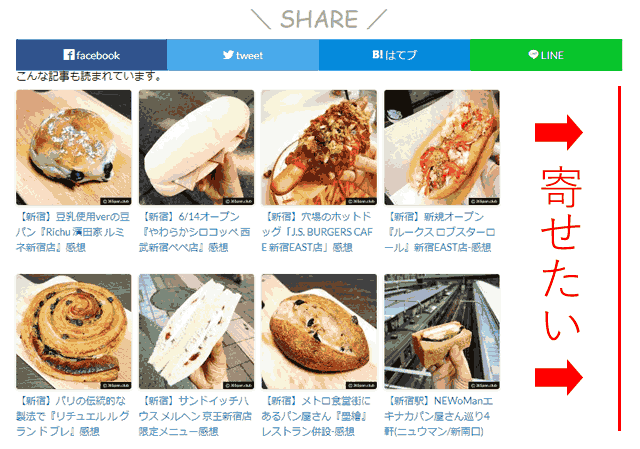
сЂЌсЂІсЂЌсђЂсЃєсЃ╝сЃъсЂФсѓѕсЂБсЂдсЂ»сЃЉсѓйсѓ│сЃ│УАеуц║сђЂсѓ╣сЃъсЃЏУАеуц║сЂесѓѓсЂФсЃљсЃЕсЃ│сѓ╣сЂїТѓфсЂЈсЂфсЂБсЂдсЂЌсЂЙсЂЌсЂЙсЂЎсђѓ
ТефсЂФуЕ║сЂёсЂЪжџЎжќЊсѓњтЪІсѓЂсЂдуХ║ж║ЌсЂФСИдсЂ╣сЂЪсЂёсѓЊсЂДсЂЎРєЊРєЊРєЊ
сЂЮсЂ«та┤тљѕсђЂУеГт«џсЃџсЃ╝сѓИсЂ«сђїEnable custom CSSсђЇсѓњСй┐сЂєсЂЊсЂесЂДсЂѓсѓІуеІт║дсЂ»сЂёсЂўсѓїсѓІсЂ«сЂДсЂЎсЂїсѓцсЃАсЃ╝сѓИжђџсѓісЂФсЂ»сЂфсѓЅсЂфсЂёсЂфсЂесђѓ
cssсЃЋсѓАсѓцсЃФсѓњуЏ┤ТјЦсЂёсЂўсѓІ
сЃгсѓцсѓбсѓдсЃѕУеГт«џсѓњсђїVertical (Large)сђЇсЂ«сЂЙсЂЙсђЂcssсЃЋсѓАсѓцсЃФсѓњуЏ┤ТјЦсЂёсЂўсѓісЂЙсЂЎсђѓ
сђїwp-contentсђЇРєњсђїpluginsсђЇРєњсђїwordpress-23-related-posts-pluginсђЇРєњсђїstaticсђЇРєњсђїthemesсђЇРєњсђїvertical.cssсђЇ
35УАїсЂѓсЂЪсѓісЂ«сЂЊсЂЊРєЊРєЊРєЊ
ul.related_post li {
position: relative !important;
display: inline-block !important;
vertical-align: top !important;
zoom: 1 !important;
*display: inline !important;
width: 150px !important;
margin: 10px 10px 10px 0px !important;
padding: 0 !important;
background: none !important;
}РєЊРєЊРєЊ
ul.related_post li {
position: relative !important;
display: inline-block !important;
vertical-align: top !important;
zoom: 1 !important;
*display: inline !important;
width: 24%;/*сЂЊсЂЊсѓњтцЅТЏ┤*/
margin: 10px 1% 10px 0px;/*сЂЊсЂЊсѓњтцЅТЏ┤*/
padding: 0 !important;
background: none !important;
}55УАїсЂѓсЂЪсѓісЂ«сЂЊсЂЊРєЊРєЊРєЊ
ul.related_post li img {
display: block !important;
width: 150px !important;
height: 150px !important;
max-width: 100% !important;
margin: 0 !important;
padding: 0 !important;
background: none !important;
border: none !important;

border-radius: 3px !important;
box-shadow: 0 1px 4px rgba(0, 0, 0, 0.2) !important;
}РєЊРєЊРєЊ
ul.related_post li img {
display: block !important;
width: 100% !important;/*сЂЊсЂЊсѓњтцЅТЏ┤*/
height: auto !important;/*сЂЊсЂЊсѓњтцЅТЏ┤*/
max-width: 100% !important;
margin: 0 !important;
padding: 0 !important;
background: none !important;
border: none !important;
border-radius: 3px !important;
box-shadow: 0 1px 4px rgba(0, 0, 0, 0.2) !important;
}78УАїсЂѓсЂЪсѓісЂ«сЂЊсЂЊРєЊРєЊРєЊ
ul.related_post li {
display: inline-block !important;
width: 150px !important;
clear: both !important;
}РєЊРєЊРєЊ
ul.related_post li {
display: inline-block !important;
width: 46%!important;/*сЂЊсЂЊсѓњтцЅТЏ┤*/
margin: 10px 2%!important;/*сЂЊсѓїсѓњУ┐йтіа*/
clear: both !important;
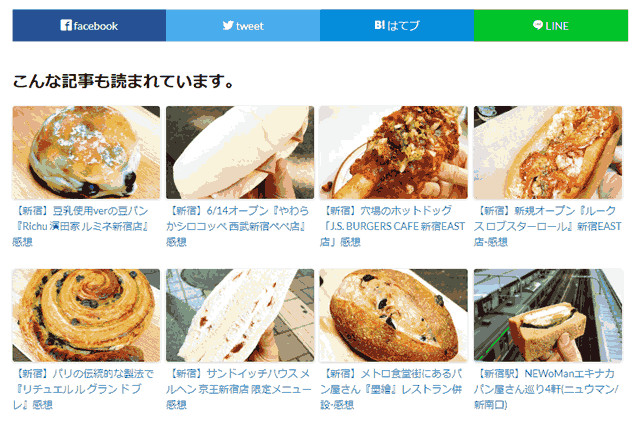
}сЂЊсѓїсЂДPCУАеуц║сЂД4тѕЌ№йў2УАїсђЂсѓ╣сЃъсЃЏУАеуц║сЂДсЂД2тѕЌ№йў4УАїсЂДУЅ»сЂёТёЪсЂўсЂФсЂфсѓісЂЙсЂЌсЂЪсђѓ
сЂцсЂёсЂДсЂФсѓхсЃасЃЇсѓцсЃФсѓѓтцЅсЂѕсѓІ
жќбжђБУеўС║ІсЂДСй┐ућесЂЋсѓїсѓІсѓхсЃасЃЇсѓцсЃФсЂ«сѓхсѓцсѓ║сЂ»сђЂсЃЄсЃЋсѓЕсЃФсЃѕсЂД150№йў150сЂфсЂ«сЂДсЃєсЃ╝сЃъсЂФсѓѕсЂБсЂдсЂ»т╝ЋсЂЇС╝ИсЂ░сЂЌсЂдУАеуц║сЂЋсѓїсѓІсЂеТђЮсЂёсЂЙсЂЎсђѓ
УеГт«џсЂІсѓЅсђїCustom size thumbnailsсђЇсЂФсЃЂсѓДсЃЃсѓ»сѓњтЁЦсѓїсЂдсђЂсЃєсЃ╝сЃъсЂДСй┐ућесЂЋсѓїсЂдсЂёсѓІуеІсѓѕсЂёсѓхсѓцсѓ║сЂ«ућ╗тЃЈсѓхсѓцсѓ║сѓњтЁЦсѓїсЂЙсЂЎсђѓ
сЂЊсѓїсЂДсЂЌсЂБсЂЈсѓісЂЇсЂЙсЂЌсЂЪРєЊРєЊРєЊ
тЈѓУђЃсЂЙсЂДсЂФсђѓ
ByсЂЋсЂАсЂі
